Sunday, 23 October 2011

.Treasure Hunt.

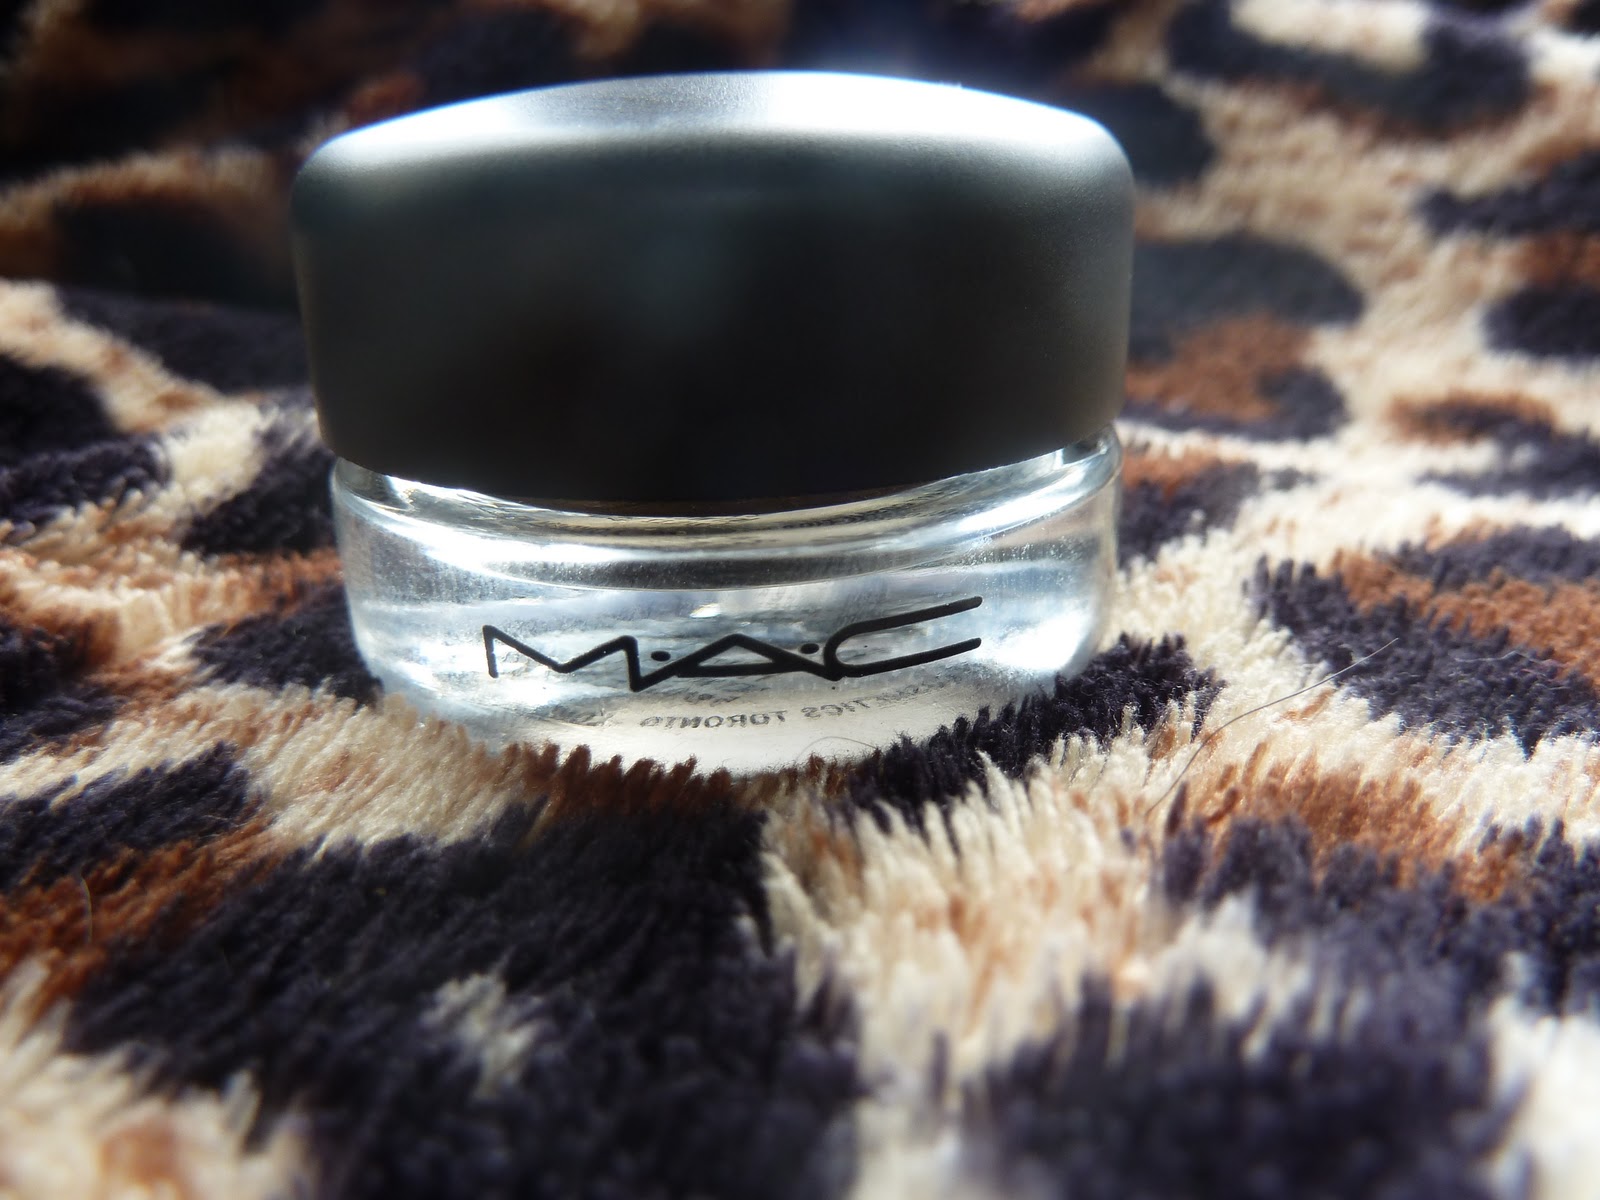
Last weekend, I was in Manchester for the annual Beauty Show with my friends and naturally we ended up in the beauty hall in Selfridges. I was hanging around the MAC counter as my friend Kelly blew her wages on lots of products, not planning to buy anything, until I spotted one of the MUAs eye make up. Whoops. She had a beautiful brown bronzed smokey eye going on with this amazing green gold glitter shade over the lid. She told me she had just used lots of browns blended together and then put a Paint Pot that was in the new collection, Posh Paradise, over it.

The Paint Pot in question is Genuine Treasure, described on the website as 'reflects antiqued gold', and retailing for £13.50.


This is my first ever paintpot, believe it or not. I am definitely more of a powder shadow fan, but I really do love the texture of this shadow, and it has great staying power. It looks beautiful on it's own or dabbed over another smokey eye look. I always apply eye primer before applying my shadow and I do think this makes a difference to the staying power.

Genuine Treasure on it's own.


Genuine Treasure over a brown smokey eye.


Full look.
All in all, a very positive first experience with MAC's Paint Pots. I am always a bit dubious of cream shadows because they have a tendancy to crease and look abit 'bleurgh' by the end of the day, but I think i've found a winner here. Also, I believe an eyeshadow base is 100% necessary for these kind of formulations. I wore this for over six hours the other day and it was still crease free and stuck fast by the time came to remove my make up. What do you think of Paint Pots, or for that matter, any other creamy based eye products?

Kate x

Sunday, 16 October 2011

.Week Five at The School of Make Up.

Monday.

We had Elaine today and she set us another challenge. She gave us a brief of establishing a character for film or television. Elaine had chosen a character for us each from either a film or a television program, and from the brief she gave us we had to create the character we thought they were. Her brief for me was a kooky young lady who worked within the media industry in the 1940s. She had a beauty mark on her cheek, a dark choppy bob and was strong and independant. Elaine wanted red lips and defined eyes. Can you guess who it was? I couldn't - note to self, must watch more films. It was Liza Minnelli in Cabaret.


Here is what I came up with on my partner Emma:


In the afternoon, we started measuring up for bald caps. This involved cling film, sellotape and a plastic head - random, but we were well on our way to becoming bald by the end of Monday!

Tuesday.

Emma was all better this week, so we had her teaching us today. In the morning, we did stubble effects with different kind of make up. I felt pretty damn sexy with some designer stubble going on...


In the afternoon we started making our bald caps. Bald cap making is not plain sailing in the slightest, and it takes a time and patience to make and fit them. Creating the cap consisted of vaseline-ing the plastic head with the template on, painting on 8 layers of cap plastic and powdering each layer with talc after drying the plastic with a hair dryer. Once the layers were completed, the caps were left over night to set. In the morning, this was the finished creation.

Creepy looking bit of scalp!
Wednesday/Thursday.

Both Wednesday and Thursday consisted of fitting the bald caps. What a bloody laugh! I actually have the biggest, roundest head I have ever seen... I don't think bald is one of my best looks. Oh well it was all in the name of research! I will say no more and give you a good old laugh with some pictures from the two days...

Bald cap being fitted.

Emma's 'seductive' bald look.


My bald cap work.

Emma and Chelsey bald.

Stroking the bald head.

Me bald... No words.
Olive and I - seductive Olivia.

The four Thursday baldies.

The four Wednesday baldies.
On Thursday afternoon, Emma also demonstrated a port wine stain which we then practiced. Port wine stains are raised on the skin so we had to build up a 3D effect with 'liquid flesh' - Lovely. In other words, liquid latex. Once it was built up, we then shaded in it.


Friday.

We had Sam today for a practice day, in which we could recap anything we had already learnt. I decided to perfect my eyeliner and lipliner. It was a nice chilled day and was good to go over things again and gain more confidence in the areas we thought we were struggling in.

I had a really fun week at the school this week, and we start airbrush make up tomorrow which I am really looking forward to! Hope you have all had a lovely weekend.

Kate x

Saturday, 15 October 2011

.LVL Lashes.

If you read my post from a couple of weeks ago about the HD Brows treatment I had, you would know I was also booking in for the LVL lash treatment. I had it done today by the lovely Azar and here is my review as promised.

LVL lashes stands for length, volume and lift. It is a lash treatment that includes no lash extensions what so ever, enhancing your natural lash. I am not a lash extension fan myself, I trained in them at college, and loved the effect. Unfortunately I hated the upkeep. For me, it was just too much hassle, and in the long run they are not good for your eyelashes. I know it may not seem like it, but I am relatively low maintenence when it comes to beauty treatments. Before I started having eye treatments, I only ever had my nails and hair done, and a spray tan for a special occasion or a night out. I love the fact LVL creates the look of lash extensions without applying any false eyelashes to your eye. Also, if you get a dodgy lash technician, you can end up having lots of problems and even hair loss, which is no fun for anyone.

Now, some of you may be thinking "isn't this just a fancy eyelash perm?". It most certainly isn't. Perming is performed using a bendy rod in different sizes depending on the 'curl' you want, which is placed on the lash line and the lashes are then, in effect, bent round the rod. This is supposed to curl the lashes but because they are going back on themselves, it actually makes the lashes look curly, but shorter. LVL uses a silicone shield that the eyelashes are pulled up onto creating the lifted look. Lashes are not curled, but straigtened and lifted. 

LVL lashes can last up to 6 weeks, which is also a plus point for girls who have been promised that their lash extensions will last that long - They hardly ever do. The problem with lash extensions is that the therapist never knows what stage of hair growth the hair they are placing the extension on is in. If the hair is ready to shed, the extension will go with it. That's life, and that's why they very rarely last as long as you are promised they will. Another thing I love about this treatment is that you don't have to wear mascara if you don't want to, but your eyes look bright and awake the minute you get up in the morning. This is a huge plus for me, due to my college course. Going to the train station in the morning with no make up on, when you are a die hard mascara fan is really not the best look.

Azar charges £45 for the LVL Lashes treatment which I actually find a reasonable price. Some of you may be thinking that it's quite expensive, but if you think about it, extensions can cost anywhere between £50-£150. I am so impressed with LVL, and it has actually given me a better effect than lash extensions have ever given me. So for me, it's 100% worth it.

LVL lashes will work better if you have relatively good lashes to start with. My lashes are very long but quite straight, so I knew they would benefit from this treatment. Azar also tints the lashes which gives definition and depth to the lashes. I went for the blackest black tint colour due to my dark colouring.

Click here to watch MUA Lisa Eldridge have her LVL treatment.

The link above will direct you to a video that shows Lisa Eldridge having the treatment done and the steps the treatment involves. Seeing as I had my eyes closed for the whole treatment, it was good to watch this to see what Azar was doing during the treatment.

Before:


After:


These pictures were taken after the treatment with NO mascara on what so ever, or any eyelash curling trickery. I think you'll all agree, the results are once again very impressive! I absolutely LOVE my natural, lifted and wonderfully long eyelashes. They actually hit my brow bone - amazing.

Check out Azar's website here.
'Like' Azar's Facebook page and check out some more before and after pictures here.
Check out the LVL website and find your nearest therapist here.

Once again, I can't recommend Azar enough if you are in the Manchester area, or the Shrewsbury area like me (She is next down here on the 5th November). So get booking girls! This is such a lovely treatment at any time of the year but would be amazing for holidays, special occasions or just when you want to make yourself feel nice! It is also totally relaxing and in no way painful. I was actually so chilled out afterwards and felt really sleepy.

I am totally hooked on both HD brows and LVL Lashes now... Maybe i'm not so low maintenence after all...

Kate x

Sunday, 9 October 2011

.Week Four at The School of Make Up.

I honestly cannot believe it has already been a month. This week we began theatrical and television make up, and here's a low down...

Monday.

Today we were meant to be taught by Emma, but unfortunately she came down with the bug that seems to have been haunting us at the school for the last couple of weeks - We've all been dropping like flies. So we had Jon again. He taught us the basic 'straight' make up for television. Obviously it depends on the show and the character. We spent the morning creating a television look of our choice. I decided to do a period look - along the lines of Downton Abbey, my current pleasure. I didn't take a picture because a) I forgot my camera, and b) it's an incredibly minimal look. In the afternoon, Jon talked us through etiquette on shoots and how we should behave. I really listen to Jon's opinions and advice, because he has been in the industry for so long and really knows his stuff.

Tuesday.

Tattoos were the flavour of the day today. It's just as well we could wash them off, because if i'm honest, it's certainly not my forte! I'll be the first person to admit that i'm not artistic, so freehand drawing just didn't get on with me. I did however find the stamp tattoos, stencil tattoos and transfer tattoos quite fun to do. Here's a picture of my friend Emma's tattoos. The fairy is a stamp tattoo and the lily is freehand. She's super talented!


Wednesday.

Today, the amazing Elaine took us for 'careers' day. A day in which she talked us through all aspects of life outside the school - pricing, tax, insurance, networking, getting experience and getting ourselves out there in the big wide world. She gave us three challenges too. By christmas, she wants us to have worked in the theatre and to have worked on a runway show. Also, by the time we have finished the course as a whole she wants us to have had some experience on a television advert - Scary! But also pretty exciting. I've already been in contact with some theatres around me and if any of you know of ANY runway shows going on, please do let me know. Elaine is so incredible about making you feel that you can do anything, she really is a one off. We also did a mock BBC interview, which I got the highest score in - Very proud, seeing as I haven't had the highest score in anything since Brickbreaker on my blackberry ;)

Thursday.

Back to practical today, this time theatre make up. Jon showed us a basic 'straight' theatre make up and in the afternoon demonstrated a theatrical ageing make up, which was pretty impressive, and will take some practice! Basic theatre make up is quite simple, but there's a few technical things that I need to get the hang of. Here's the pictures of Jon's demos.


Priya and her theatre make up.

Jemma with her old wrinkly face!

Friday.

Today was a fun day, where we were allowed to do whatever we liked. Jon asked us to think of a fashion look and then accessorize it with gems, crystals, feathers the works! I decided to practice the two things I feel I need to work on the most - Eyeliner and Lips. When I say lips, I mean getting the lipline as perfect as possible. I based my look on Chanel's recent show at Paris Fashion Week. Slick of black liner and pearls for a decorative effect. I decided to add a red lip to it as well.


Jon took us through call sheets, understanding scripts and all sorts of things to do with television and filming - it's all abit of a mind field and I think i'll only get the hang of it when i'm out in the industry!

Hope you're all okay, and have had a lovely week! Next week at school we are doing more television make up, along with bald caps! So prepare for some hilarious photos in next weeks post.

Kate x

Sunday, 2 October 2011

.Week Three at The School of Make Up.

Hello again! I really can't believe a) it's October and b) I'm going into my fourth week at school. Here's a round up of what happened in week three.

Monday.

Jon took the class today, and we did make up to a time limit. More often than not, and especially if you are working on a runway show, you need to work quickly to get the look the client is looking for. Alot of the time you only have 15-30 minutes to create a full look - daunting! Jon gave us each a brief and gave us 30 minutes to create that look. I was working with Priya, and he gave me a goldy/browny/black smokey eye with bronzed skin and gold toned lips.

Finished look to a time limit.
In a perfect world, I would have put some false lashes on, and made the colour slightly more pigmented. I would have also focused on the skin slightly more, concealing and warming it up. Obviously that will come with time. I quite like the pressure being put on me, which I didn't think I would. In the afternoon we had a good chat to Jon about working in the industry and how people expect you to behave, in fashion and in television. Jon worked with Versace for nine years so he's got some brilliant tales of the fashion world. And Donatella really isn't that orange in real life.... Who'd have thunk it?! He gave us some amazing advice about getting started once we finish our course and how to grow into a successful and professional make up artist.

Tuesday.

Jon took the class again today, and we did 'beauty' make up and hand/body make up. I was the demo model for Jon to work on the beauty look, which was fun. When I say beauty, think skin care adverts and foundation adverts. The model looks like she has no make up on but in reality you're putting more on than any other look. In effect, I had a foundation mask on. Eyes and lips are very understated, with slight contouring to the cheeks. The client wants to consumer to look at the advert and think either she has no make up on, or the foundation looks incredible. Beauty shots are lit amazingly well and the look does look beautiful on camera. For this reason, a lot of the time other ad campaigns will use beauty make up, but add a dramatic eye or lip to it. Check out the half on, half off photo I did - you end up forgetting what your skin looks like underneath all the product! 
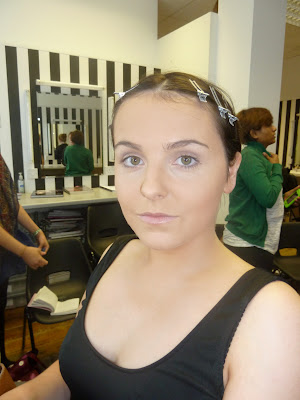
Jon's beauty look demo.

Half on, half off!
In the afternoon, Jon demo'd on me again, this time making up my arm. I actually think body make up is amazing, and I use MAC Face and Body on myself for nights out, instead of instant tan. It just gives a very natural look to your skin, evening out any uneven pigmentation and giving you abit of a glow if you use a darker shade. It is obviously done alot more meticulously in the make up industry, normally being stippled onto the skin and blended with a sea sponge. It then normally needs sealing to the skin with a special spray - and it's a nightmare to get off!

Wednesday.

Sam took us today, and it was such a fun day! Wednesday was glamour/drag make up - I had been looking forward to this since I signed up for the course. It didn't disappoint! The look Sam demo'd was a pink/purple glamour eye, massive lashes, flawless heavy base, heavy contouring and loud and proud pink lips. I'll let the pictures speak for themselves...

Sam's demo

My glamour look on Jemma

Eye close up.

Closed eye.

Thursday.

Elaine took us today, which was very exciting. We did 'working to a brief on current trends'. Elaine had scoured vogue.com, finding us all different looks from London, Milan and New York Fashion week. What she didn't do though, was tell us what designer it was. She was also very vague, because she says that alot of the time, on jobs the client will be a male who is very much like that and expects you to just know what we are doing. We were allowed to ask Elaine questions about the look to try to get as much information as possible. The brief Elaine gave me was 'sophisticated eye look'. After my questioning I had got that the look was a khaki/brown smokey eye, heavy flawless base, slight contouring, bare natural lips , natural eyebrows and no false lashes. So with that idea in mind, and not having a clue what the actual look or designer was, I went to work on my partner Olivia. This is what I came up with...


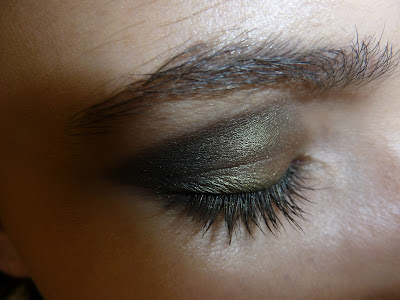


In the afternoon Elaine then showed us the look she had based the brief on. Mine was based on Emilio Pucci's S/S 2012 look. Here is a link to the look Elaine had chosen for me http://www.vogue.co.uk/fashion/spring-summer-2012/ready-to-wear/emilio-pucci/backstage-photos/page/1#/image/13

All in all, I was quite pleased with my look, and Elaine said it was pretty much spot on. However the one thing I didn't ask was the intensity of the smokey eye, it should have been a little bit more dramatic.

Friday.

For the first time in three weeks, I wore make up to school! This is because Friday was soley a demo day. Sam did a demo on Priya first, to show us a typical Asian look. In the afternoon we watched two pre-done demos on mature skin and oriental skin. Obviously in an industry that is very diverse culture wise, we need to know how to create looks on all face types, shapes and colours, so this was an interesting day. We also touched on black skin, which is very similar to make up on a caucasian skin, just a few shades darker on the colour wheel. We had an early finish on Friday which was a nice treat, especially as a few of us in the group were going out that night in Manchester. Me and Olivia popped to Selfridges to check out the new beauty hall - HEAVEN! Check it out ASAP if you're a northern girl.


Sam's Asian skin make up demo.

Hope you're all having a lovely weekend. I'm thoroughly looking forward to The XFactor, Downton Abbey and TOWIE later on!

Kate x


Saturday, 1 October 2011

.HD Brows.

Ever since I saw the HD Brow Palette in Look magazine a couple of years ago, I have wanted to have the treatment done. Today, I finally got round to it. And now i'm not sure how I coped without HD Brows before!

HD Brows is 7 steps to perfect eyebrows. The therapist uses a range of techniques including tinting, waxing, plucking, trimming, threading and shaping to define and frame your eyebrows, creating an elegant and beautifully defined look.

Unfortunately, when I was in secondary school, as many girls do I got 'pluck happy'. In a major way. I plucked them until there was no more than a pencil thin line and I honestly didn't think they would ever grow back. With a lot of patience, and restraint from the tweezers, they did begin to grow. It's only this year they have got to the stage that I am happy with them, and felt I have enough eyebrow to work well with. Strangely enough, as a girl who loves having beauty treatments, I have always done my own brows, whether it be tinting them or plucking them. Don't get me wrong, i'm all for shaped and tidy brows, but my idea of luxury isn't being plucked and waxed and it is this reason I never paid for the service and did it myself. However, once my eyebrows had grown I decided it was time to get them properley shaped and taken care of by a professional. That is where Azar comes in.

Azar is specially trained in HD Brows, LVL and Nouveau Lashes. She is based in central Manchester the majority of the time, and luckily for me comes to my town a few times a year to perform treatments and make us all feel pretty. I have only had HD brows with her, but I am booking in to have LVL lashes with her too and I can honestly say she is very talented and excells in this field. I had grown my eyebrows for about two weeks before this treatment, so she had plenty to work with. As an 'eyebrow' treatment virgin, I was quite nervous in a silly way about handing over my brows to someone else, but I needn't have worried. Azar started off by asking me what type of shape I wanted to go for (I chose a quite dramatic arched look, taking some of the bulk from below my brow) and what colour I wanted (I have a thing for dark brows, so naturally I chose dark brown. Seeing as I am dark haired anyway, it suits me, but the technician would be able to help you make a choice if you weren't as sure as me). She then set about working her magic on my brows.

She began by tinting by brows so she could see exactly where the hairs were and which ones needed removing. Once that was done she trimmed down any longer hairs and waxed underneath, creating the appropriate arch shape. She then threaded top and bottom, which gets rid of all the tiny fine hairs you never normally remove through plucking. She also got rid of some 'baby' hair I have on my forehead and told me that my make up would go on much smoother as a result of that - definite plus point. Once the threading was finished, she plucked away any stray hairs and brushed through my brows to check that the desired effect had been reached. If a client has some reddening of the skin after the treatment, Azar would apply some mineral make up to disguise it until it fades in the next few hours. I didn't need that, nor did I need any pencilling or shadowing in of my brows, because the colour was very dark already.

The treatment only took about half an hour. It was 99% painless as well - I have heard horror stories of threading but I actually liked the feeling. I suppose it is all down to your own pain threshold. Azar charges £25, which I am more than happy to pay for, after the effect I have got. In the last few weeks of college, the tutors are constantly saying how important eyebrows are in shaping and framing the face and how much they can change a look. They really can, and I think it's good to keep them tidy and fresh looking. Your eyes are the window to your soul, or so i've heard, so it's always nice to frame them with gorgeous brows as far as i'm concerned.

Now it's time for the pictures....


Before
After.
Before.

After.

Before.
After.
I adore the result. Love, love, LOVE it! I am so happy with my new brows and feel like they look 'done', even when i'm not wearing any make up. I think it's a lovely treatment to have and it has made me feel really good about myself. Azar also did two of my friends, Lucy and Cassie, and the results were just as good on them.

HD Brows website. - Find your nearest therapist here. I HIGHLY recommend Azar if you are in the Manchester area

Azar's Facebook Page. - Check her out on facebook. Lots of before and after pics, not only of HD brows but of other treatments too.

Azar's salon website: ShuSha Beauty - All the contact details and information you need to book yourself in.

So there we have it. I am really chuffed with my new 'High Definition' brows and can't see myself going back to 'normal' brows any time soon!

Kate x


My HD brows in all their glory.